
AI 生成视频,使用Stable Diffusion Deforum,总时长 3'12",分辨率 768 x 512,帧率 24,显卡 GTX 1070,合成总耗时 8 小时。把控风格在 C64 位图风格。
【AI绘图】Stable Diffusion 手机拍摄照片风格化,核心非保姆教程
目标
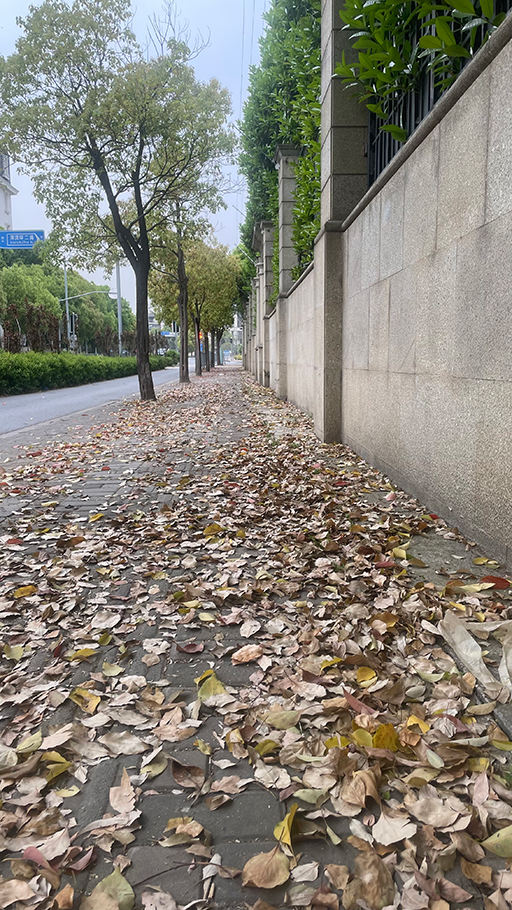
把这样一张照片:
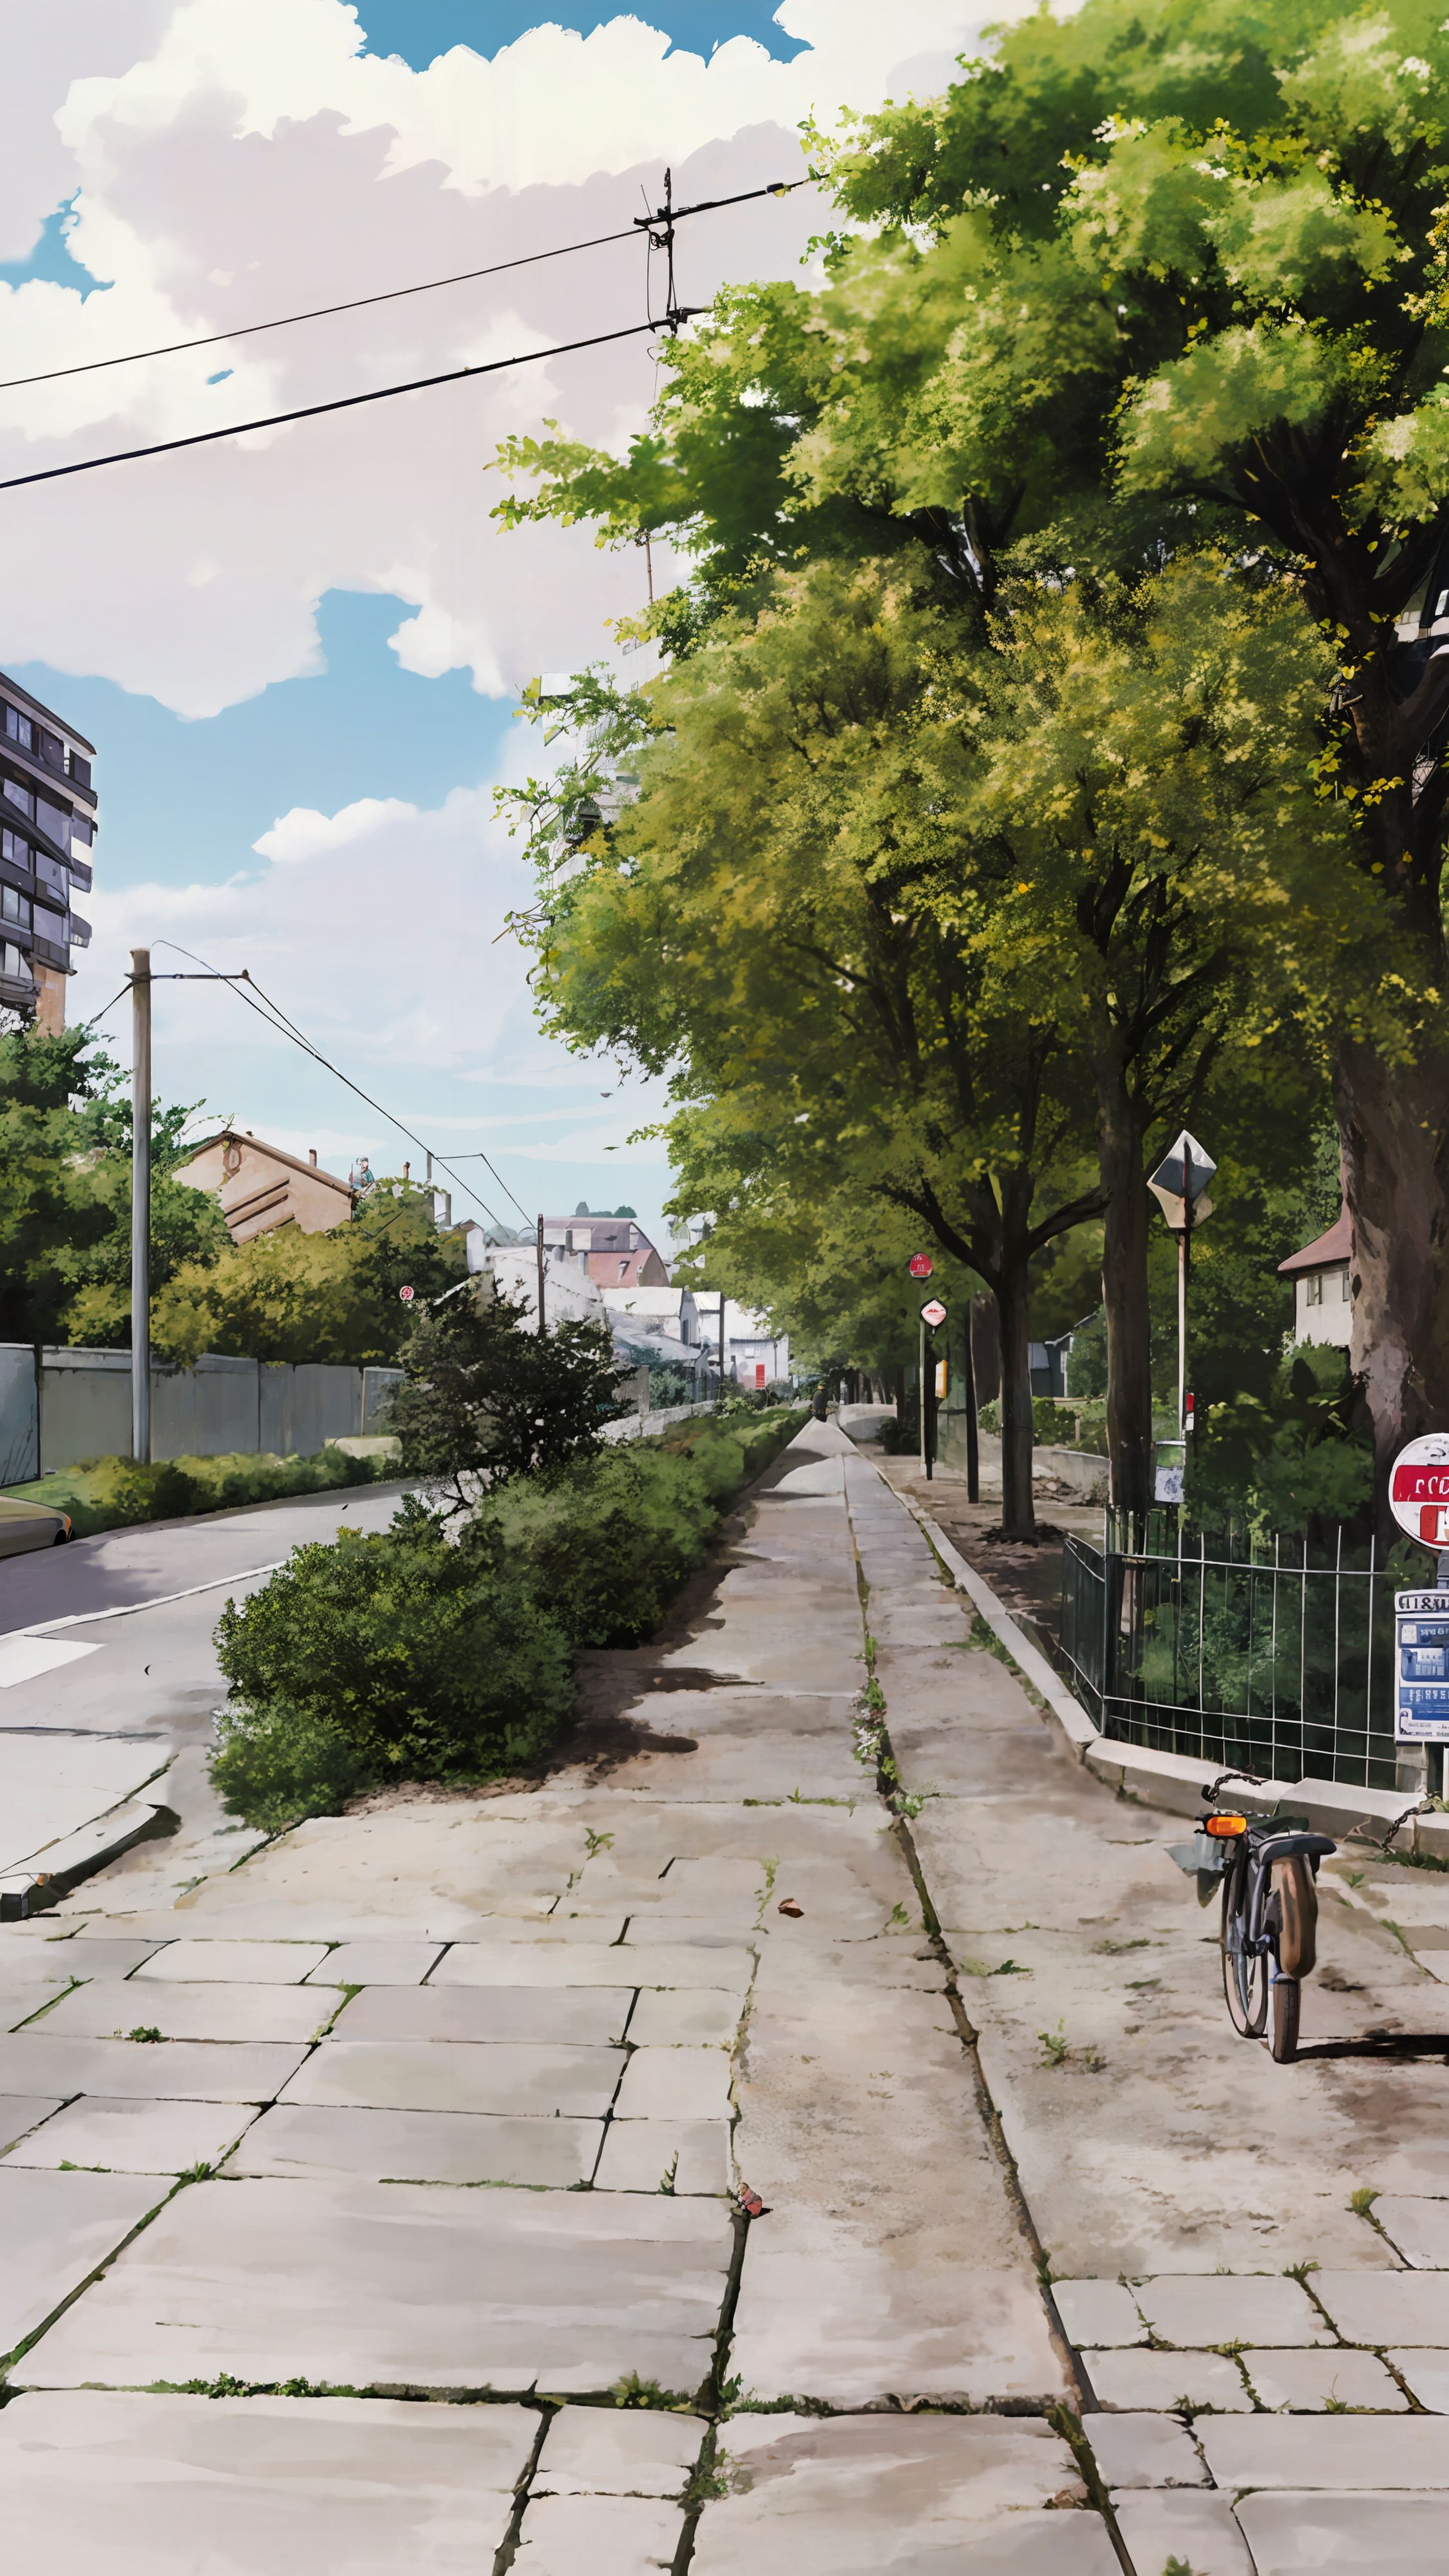
变成这样:
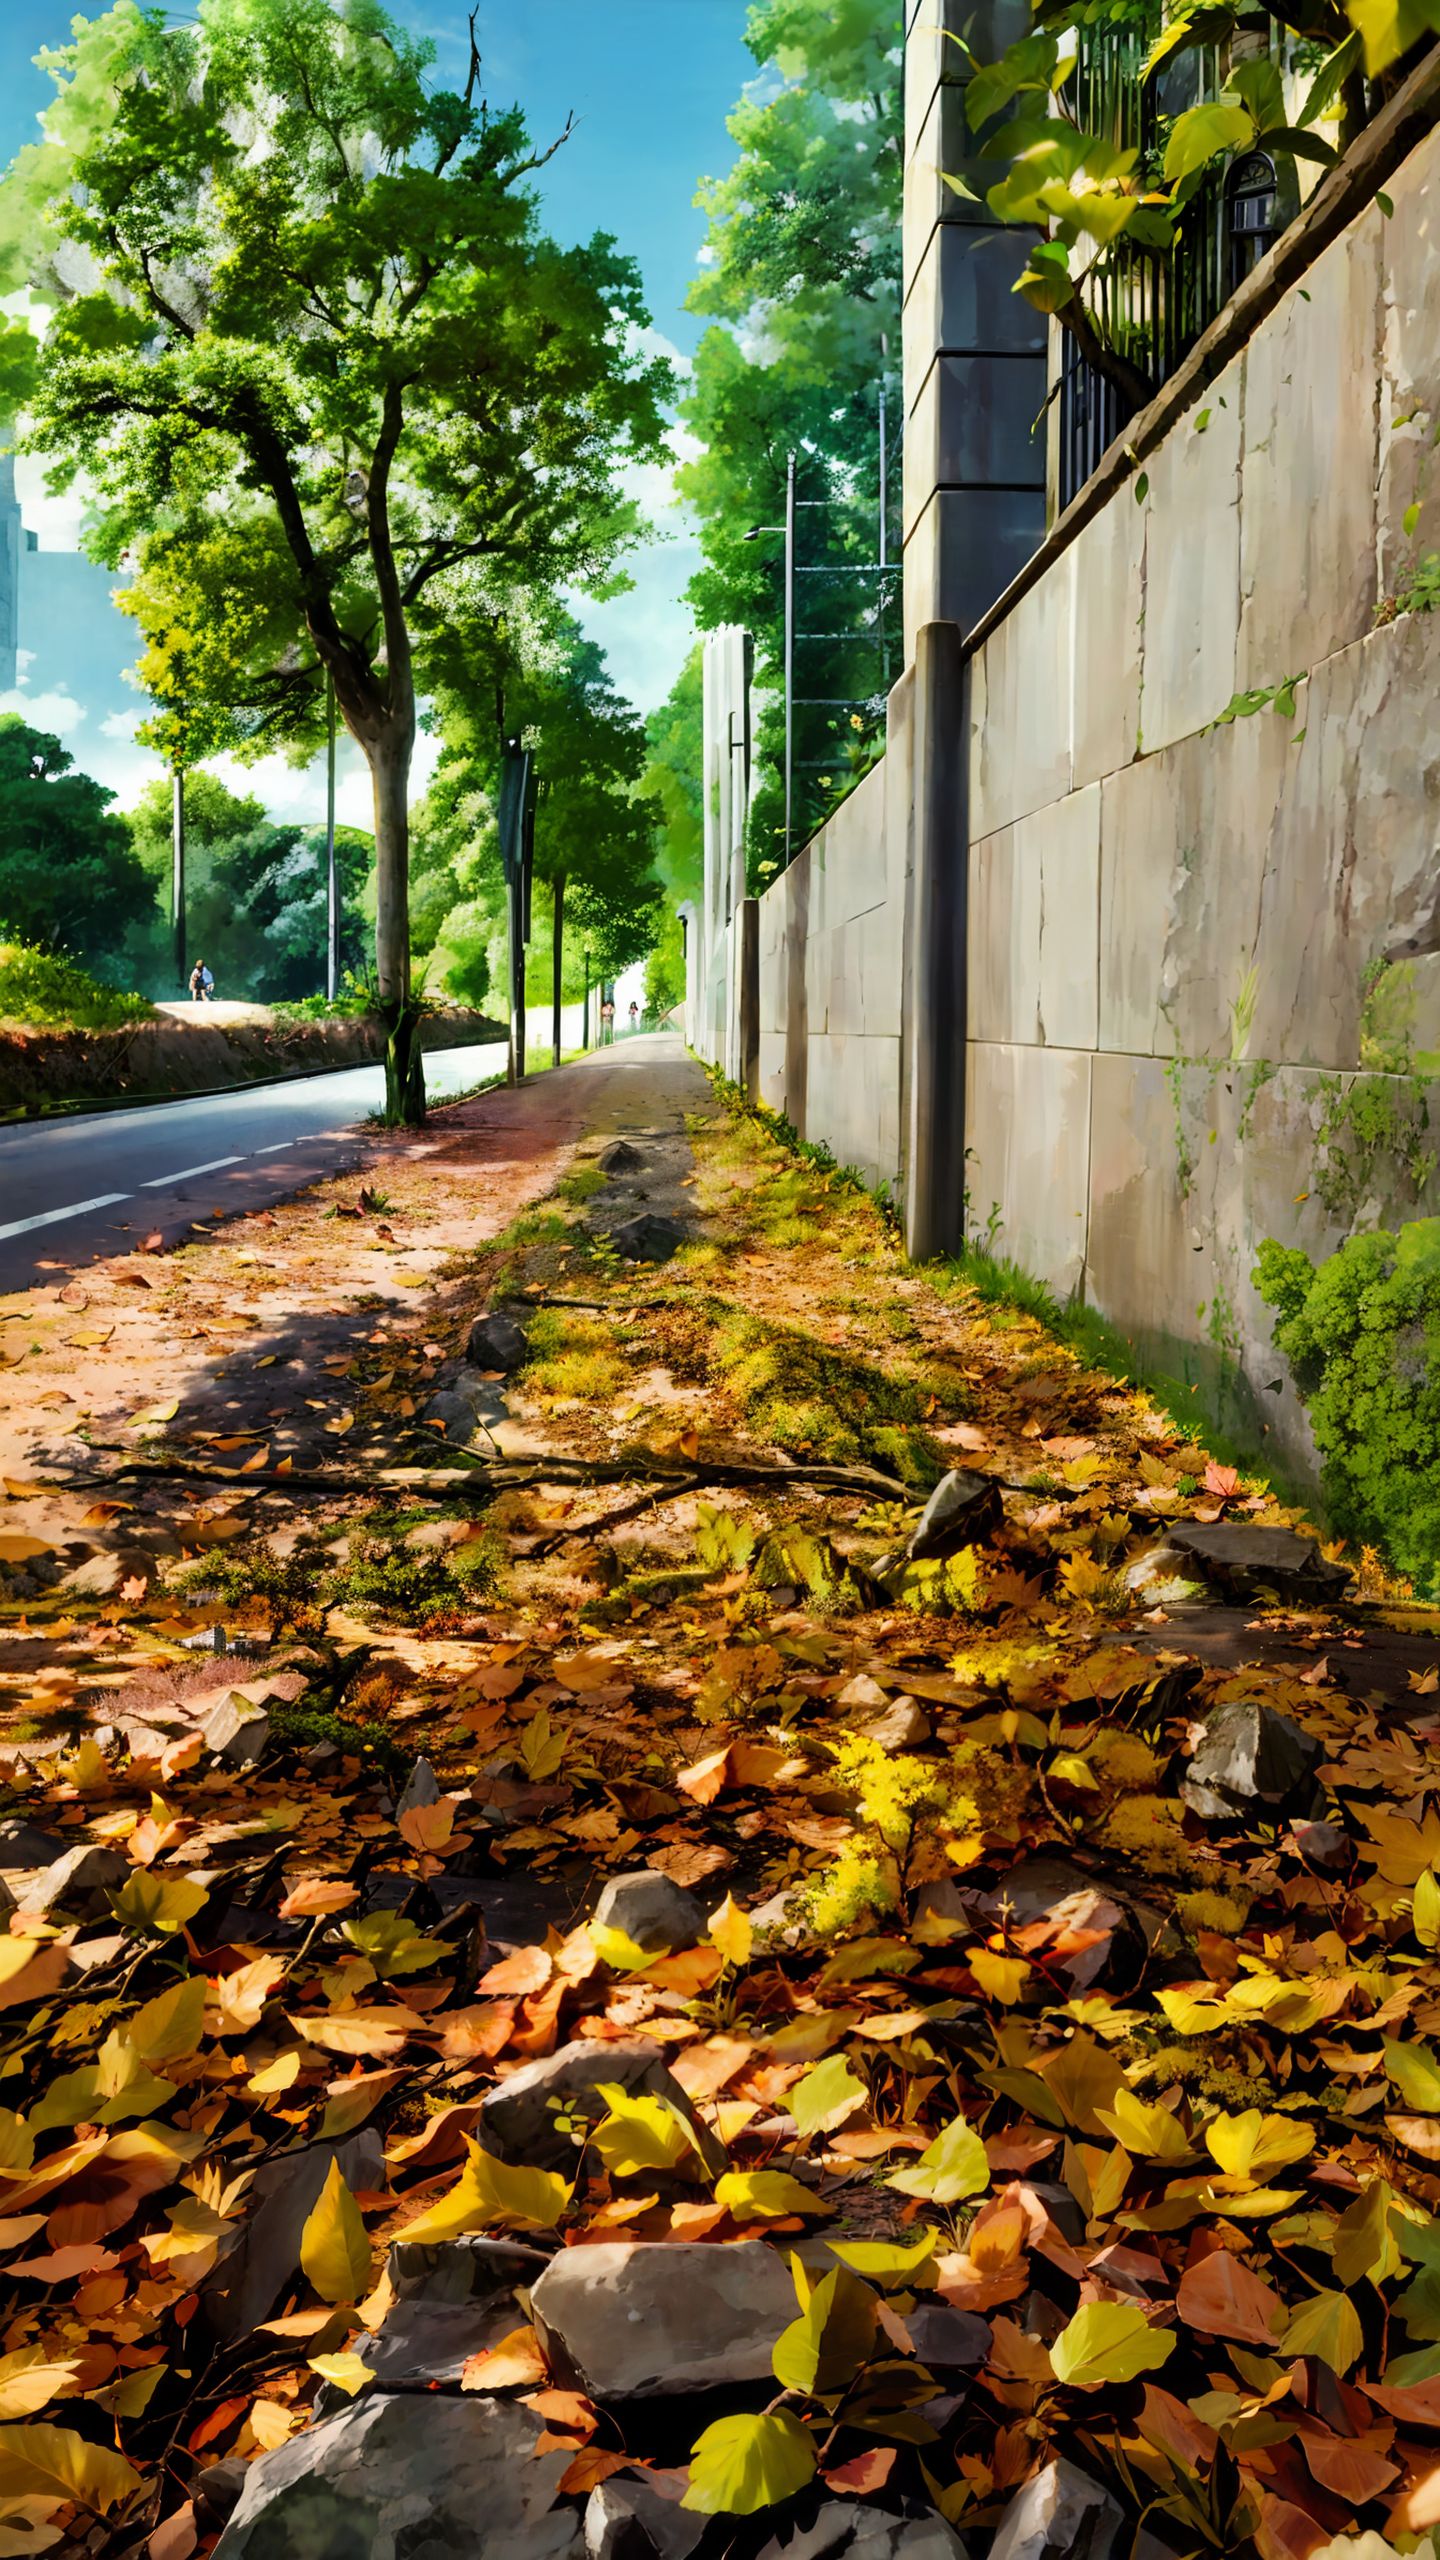
准备工作
安装部署 stable-diffusion-webui
主程序:https://github.com/AUTOMATIC1111/stable-diffusion-webui
安装 stable-diffusion-webui 的扩展
https://github.com/Coyote-A/ultimate-upscale-for-automatic1111.git
用于最终高清修复
https://github.com/Mikubill/sd-webui-controlnet.git
可以理解为用于对绘图内容进行一定程度的额外限制的限制 AI 发挥的工具
https://huggingface.co/lllyasviel/ControlNet
controlNet 所用的基础模型
https://github.com/pkuliyi2015/multidiffusion-upscaler-for-automatic1111.git
本来是个高清修复工具,我现在主要用它来划分区域来绘制图像
下载安装对应的 Checkpoint
https://huggingface.co/ckpt/anything-v4.5
我自己常用的一个用来绘制动漫风格的基础模型
下载安装对应的 Lora
https://civitai.com/models/6526/studio-ghibli-style-lora
一个被训练出来用于绘制吉卜力工作室风格的 Lora 模型
所有这些插件模型 lora 等安装方法,请自行搜索,教程很多,这里不赘述。
开始一步一步来
转换照片分辨率
其实我第一张照片拍摄出来,从手机导出来的分辨率是比较大的: 2268 x 4032
那么第一步就是把原始照片的分辨率等比降低,降低到 512 x 910
做这一步有两个好处:处理低分辨率图片节省算力,同时在高清修复的时候 AI 有更多的发挥空间
导入照片
将转换好的低分辨率照片,通过 img2img(图生图),导入进去,然后点击右边的 Interrogate DeepBooru 按钮先自动识别一下 prompt
可以看到识别出来的 prompt 和实际照片是有差距的,那么就手动调整一下,但先不填到 prompt 中,因为我们后面需要用到 Region Prompt Control
负面提词使用:
(painting by bad-artist-anime:0.9), (painting by bad-artist:0.9), watermark, text, error, blurry, jpeg artifacts, cropped, worst quality, low quality, normal quality, jpeg artifacts, signature, watermark, username, artist name, (worst quality, low quality:1.4), bad anatomy
img2img 设置分辨率:720 x 1280
Stable Diffusion checkpoint: anything-v4.5
Sampling method :DPM++ SDE Karras
Steps: 30,CFG scale: 8,Denoising strength: 0.7
设置 controlNet
将图导入 controlNet,启用后,设置画布大小为:512 x 910
Preprocessor:canny
Model:control_sd15_canny
设置 Tiled Diffusion
点开 Region Prompt Control,这个就是区域绘制
点击启用后,导入低分辨率的原图。
我们启用三个区域,即:Region 1,Region 2,Region 3
划分 Region 1 为背景,Region 2 为前景,Region 3 为前景
大概其这个样子:

具体的参数:
Region 1
Type: Background
x: 0, y: 0, w: 1, h: 1
Prompt:
ghibli style, <lora:studioGhibliStyle_offset:1>,
branch, city, day, grass, nature, outdoors, overgrown, plant, road, fallen leaves, rock, scenery, sky, tree
Negative Prompt:
(painting by bad-artist-anime:0.9), (painting by bad-artist:0.9), watermark, text, error, blurry, jpeg artifacts, cropped, worst quality, low quality, normal quality, jpeg artifacts, signature, watermark, username, artist name, (worst quality, low quality:1.4), bad anatomy
Region 2
Type: Foreground, Feather: 0.2
x: 0, y: 0.24583333333333343, w: 0.39274088541666646, h: 0.20833333333333326
Prompt:
ghibli style, <lora:studioGhibliStyle_offset:1>, grass, green plant, scenery, sky, tree
Negative Prompt:
(painting by bad-artist-anime:0.9), (painting by bad-artist:0.9), watermark, text, error, blurry, jpeg artifacts, cropped, worst quality, low quality, normal quality, jpeg artifacts, signature, watermark, username, artist name, (worst quality, low quality:1.4), bad anatomy
Region 3
Type: Foreground, Feather: 0.4
x: 0, y: 0.4, w: 1, h: 0.6
Prompt:
ghibli style, <lora:studioGhibliStyle_offset:1>, road, yellow fallen leaves
Negative Prompt:
(painting by bad-artist-anime:0.9), (painting by bad-artist:0.9), watermark, text, error, blurry, jpeg artifacts, cropped, worst quality, low quality, normal quality, jpeg artifacts, signature, watermark, username, artist name, (worst quality, low quality:1.4), bad anatomy
绘制风格图像
参数都固定下来以后,就可以点击 Generate 来生成图像了
有时候一张可能不满意,那就多生成几张,我一般直接生成 9 张,从里面挑选一个满意的,进行图生图,选中你满意的那张图直接 Send to img2img
高清修复
接下来就是最后一步的高清修复了,我们需要把低分辨率的图像重绘为高分辨率图像。
经过上面一步,Send to img2img 后,需要修复的图像已经准备好了
接下来把 Tiled Diffusion 以及 ControlNet 关闭
点击下方 Script 选单,选择 Ultimate SD upscale
嗯,这个高清修复工具,可以让图像分块进行渲染,最后再把它拼起来,这样小显存也可以渲染大图啦。如果您是大显存的壕,可以直接忽略这一步,接下来是具体的参数
Target size type: Custom size
宽高我们就设置为 2k 分辨率,1440 x 2560
Type: Chess,
Upscaler: R-ESRGAN 4x+ Anime6B
对了,我们还要把头部的 Prompt 给填上,其实就是合并之前 Region 1-3 的 Prompt 就好了
ghibli style, <lora:studioGhibliStyle_offset:1>,
branch, city, day, grass, nature, outdoors, overgrown, plant, road, fallen leaves, rock, scenery, sky, tree
最后把 Denoising strength 参数改为 0.3
点击 Generate
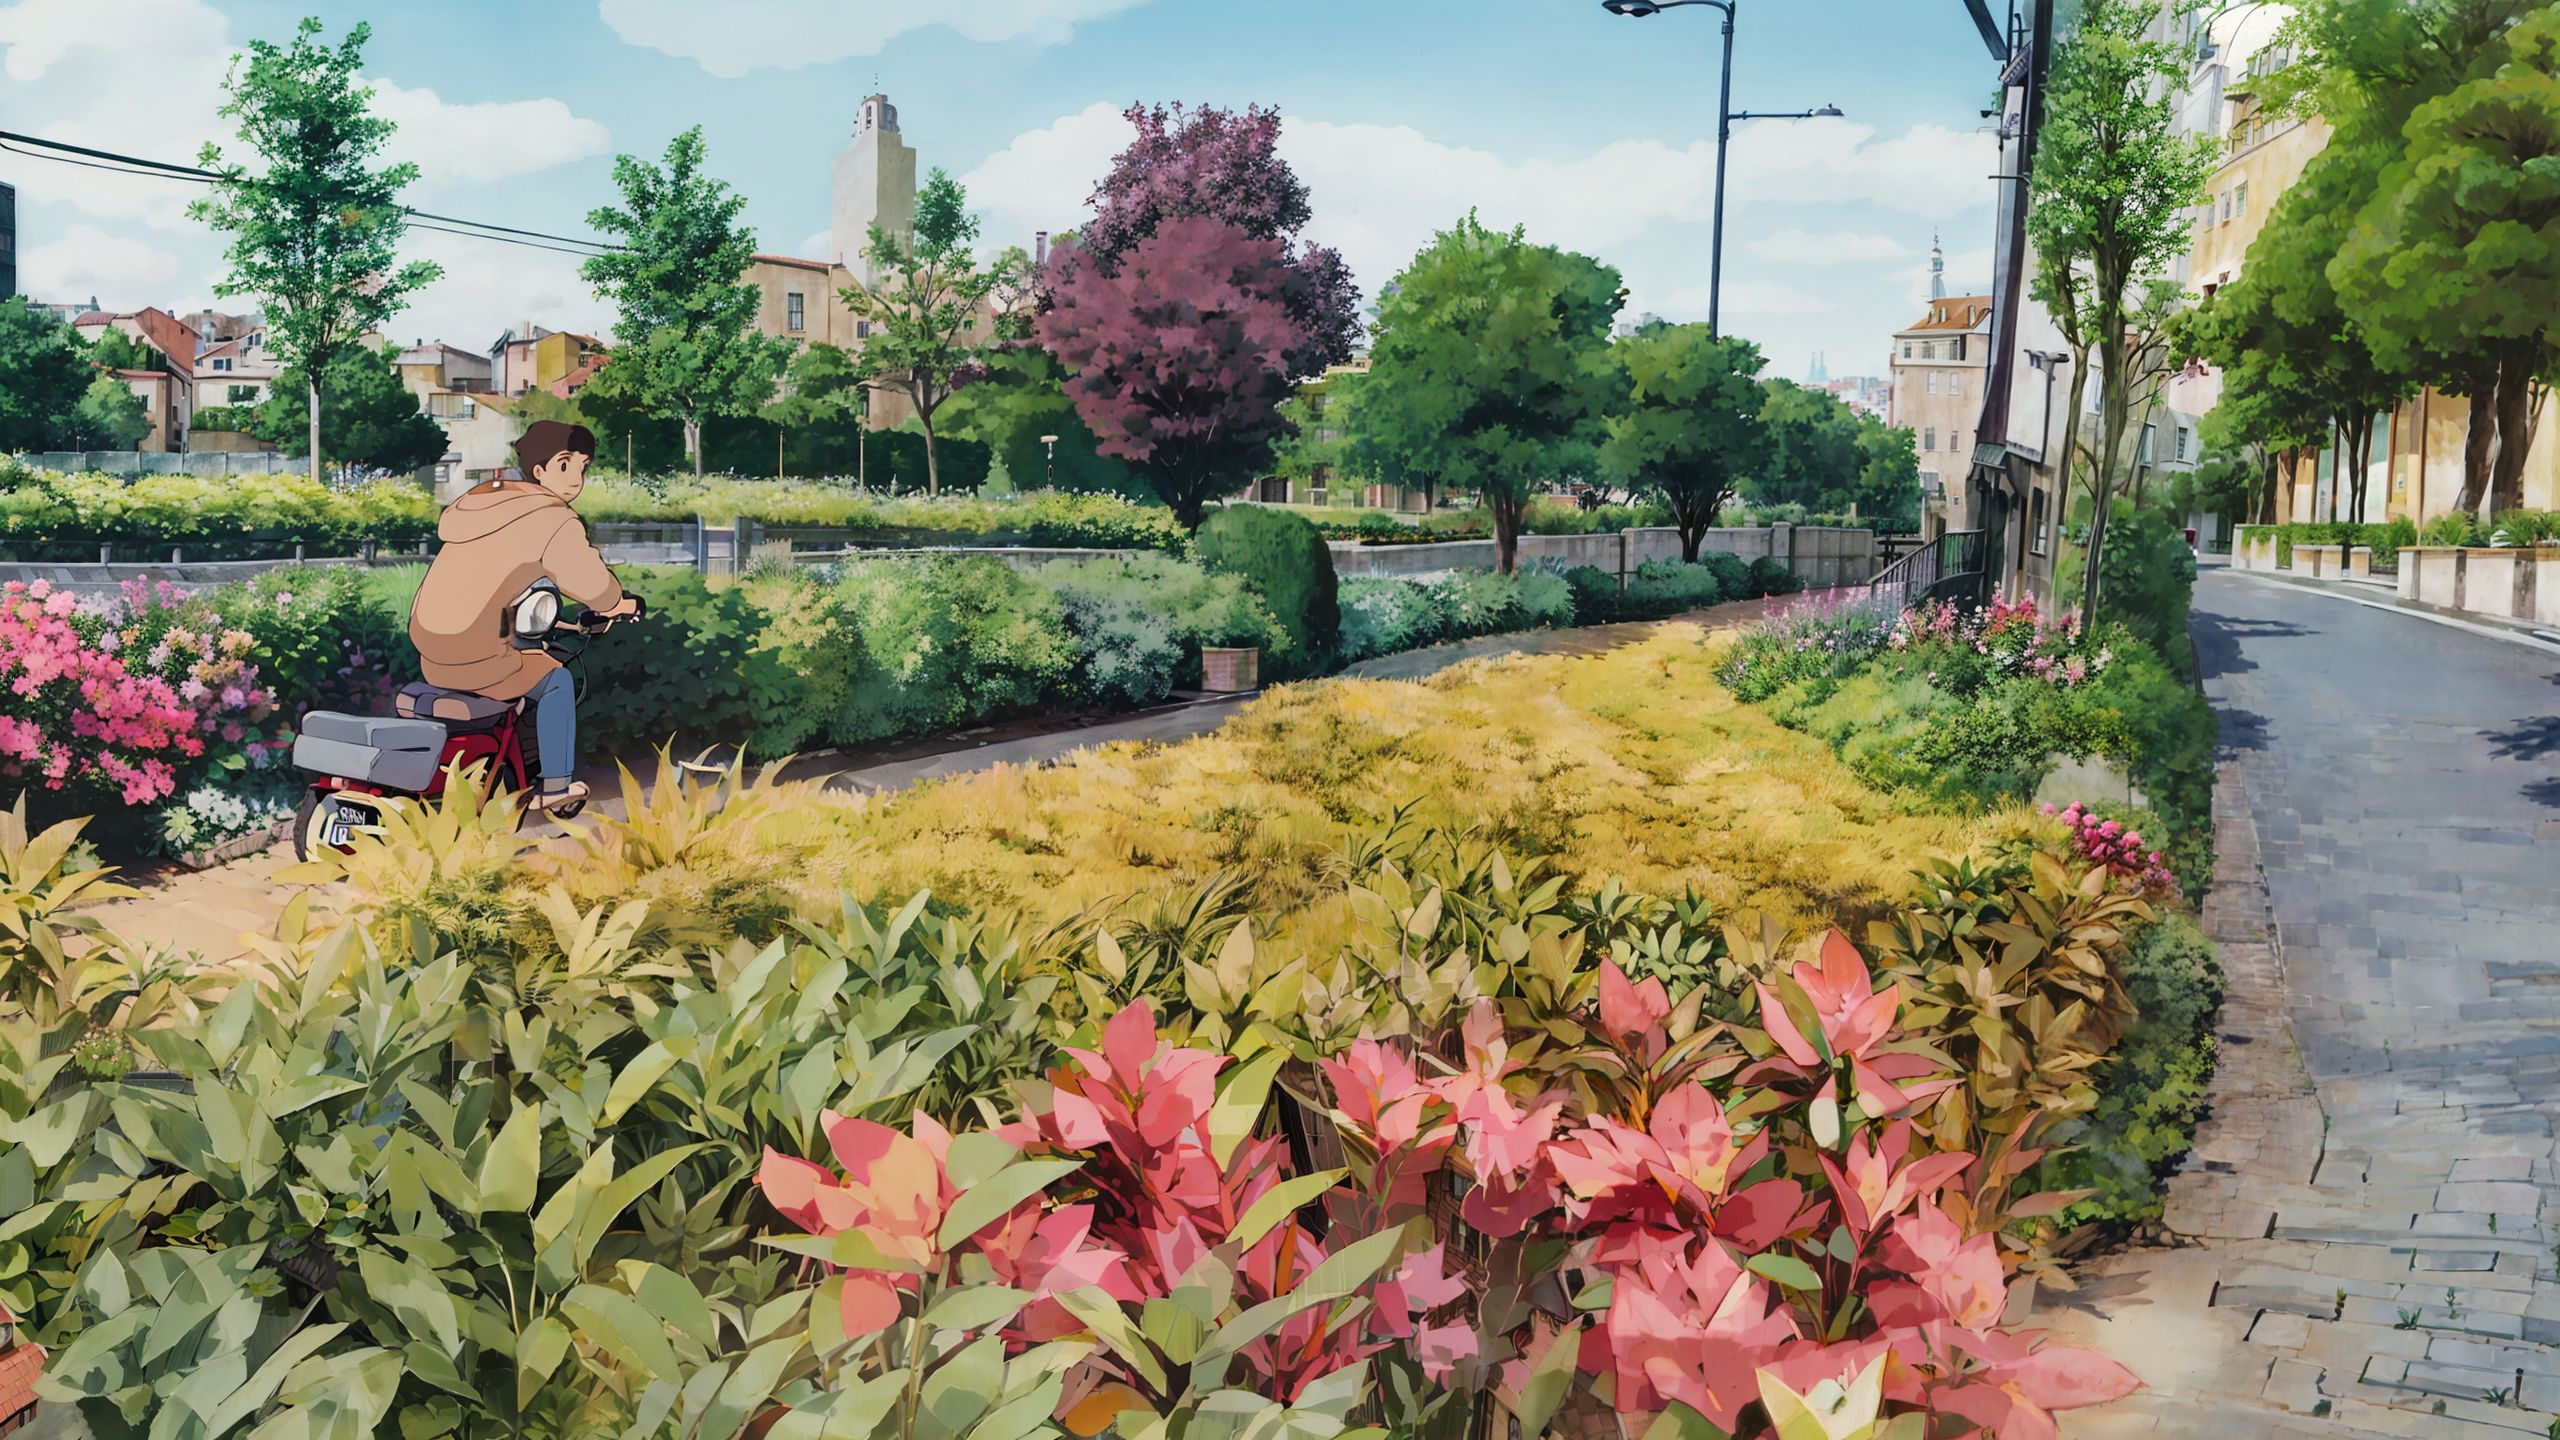
图出来,大功告成
最后总结
其实总结起来思路就是先用小图,绘制风格化的图,再用风格化的图进行高清修复
还是挺容易的吧? o(〃'▽'〃)o
【AI绘图】使用吉卜力工作室风格重绘我今天的跑步路上的风景